1,Testing specimens:
The user provides a total of 12 round bar specimens with a diameter of 10 mm and a length of 10mm to 60 mm. It is necessary to measure the cylindrical hardness of the samples.
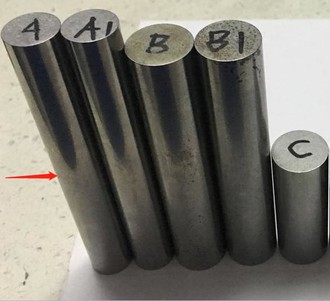
Photo 1. The specimens are shown same as in above photo:
2,Current main measuring issues:
The traditional bench Rockwell hardness tester is slow to measure, will takes 50 seconds for each test, and the indentation is very big, which affects the subsequent assembly and usage.
The user hope to find an efficient and accurate hardness measuring instrument for quick measurement and screening of the specimens.
3, Measurement solution:
Based on the current user’s main measuring issues, we decided to measure the specimens’ hardness using an ultrasonic hardness tester. Because the single measurement time of ultrasonic hardness tester is 3 seconds, the efficiency is increased by 17 times compared to the Rockwell hardness tester. And the indentation is very small, and does not affect the subsequent assembly and usage of the user.
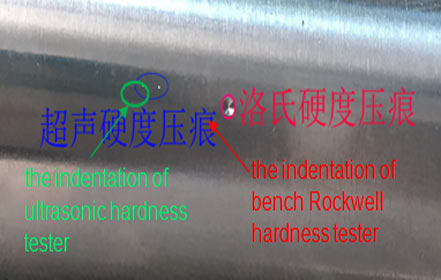
Photo 2. Comparison of Rockwell hardness indentation and ultrasonic hardness indentation
4,Instrument configuration:
SU-400 ultrasonic hardness tester + MU100 testing stand + V-type Cylinder Support Ring
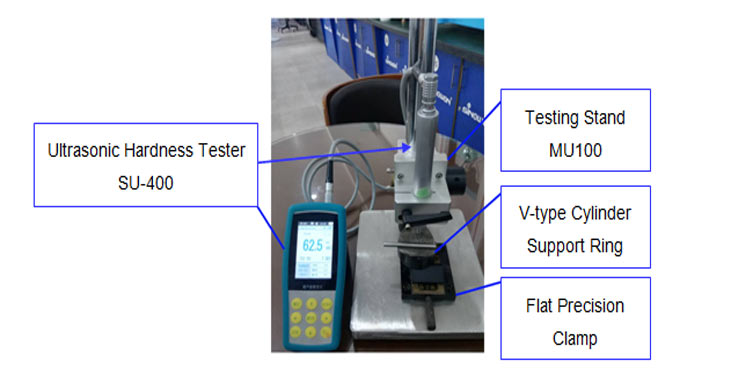
Photo 3, SU-400 ultrasonic hardness tester testing real shot photo
5,Test result comparison between bench Rockwell hardness tester and Utrasonic hardness tester.
A1) Hardness Testing Data Statistics and Analysis of Round Bar Specimens using DigiRock DR3
Digital Rockwell Hardness Tester.
| S.
No. |
Hardness Test Results of DR3 Digital Rockwell hardness tester (HRC) |
Average Value
(HRC) |
Repeatability
(HRC) |
|||||
| 1 | 2 | 3 | 4 | 5 | 6 | |||
| A | 63.0 | 63.9 | 63.2 | 62.9 | 62.3 | 62.7 | 63.0 | 1.6 |
| A1 | 62.9 | 62.7 | 62.6 | 63.2 | 63.5 | 63.4 | 63.1 | 0.9 |
| B | 64.0 | 64.4 | 64.8 | 65.1 | 65.1 | 64.9 | 64.7 | 1.1 |
| B1 | 64.4 | 65.0 | 65.0 | 64.1 | 65.3 | 64.6 | 64.7 | 1.2 |
| C | 63.6 | 63.8 | 63.9 | 63.8 | 63.9 | 63.2 | 63.7 | 0.7 |
| C1 | 64.2 | 64.3 | 64.3 | 63.9 | 63.6 | 64.5 | 64.1 | 0.9 |
| D | 61.6 | 62.3 | 62.2 | 62.2 | 61.8 | 62.5 | 62.1 | 0.9 |
| D1 | 61.7 | 61.5 | 61.7 | 62.0 | 62.3 | 61.9 | 61.9 | 0.8 |
| E | 64.5 | 65.1 | 64.9 | 65.1 | 64.9 | 64.6 | 64.9 | 0.6 |
| E1 | 64.4 | 64.2 | 64.7 | 64.9 | 65.0 | 64.3 | 64.6 | 0.8 |
| F | 62.6 | 62.8 | 63.0 | 62.8 | 61.8 | 62.9 | 62.7 | 1.2 |
| F1 | 62.9 | 63.1 | 62.9 | 63.4 | 62.5 | 62.8 | 62.9 | 0.9 |
Remarks:
1)The value of the red font is the maximum and the minimum of the same specimen of 6 times of the measurements.
2)Test time: 50 seconds/piece.
3)The times of the measurements:12×6=72 times ( 12pcs round bars, each round bar has been tested 6 times)
4)Total test time: around 65 minutes.
5)Maximum repeatability: 1.6HRC, minimum repeatability: 0.6HRC
A2) Hardness Testing Data Statistics and Analysis of Round Bar Specimens using Utrasonic
Hardness Tester.
| S.
No. |
Hardness Test Results of
Utrasonic hardness tester (HRC/UCI) |
Average Value
(HRC) |
Average Value
(HRC) |
|||||
| 1 | 2 | 3 | 4 | 5 | 6 | |||
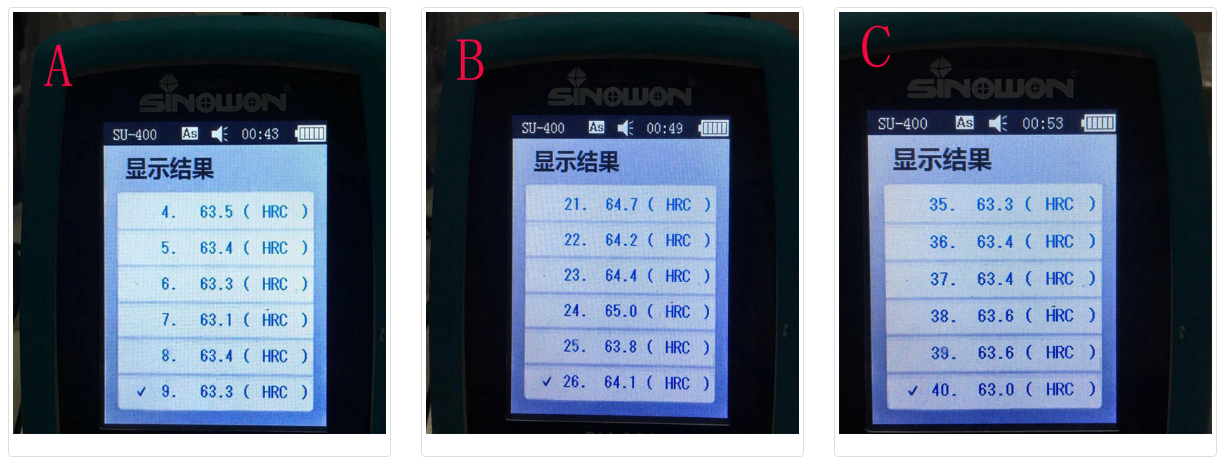
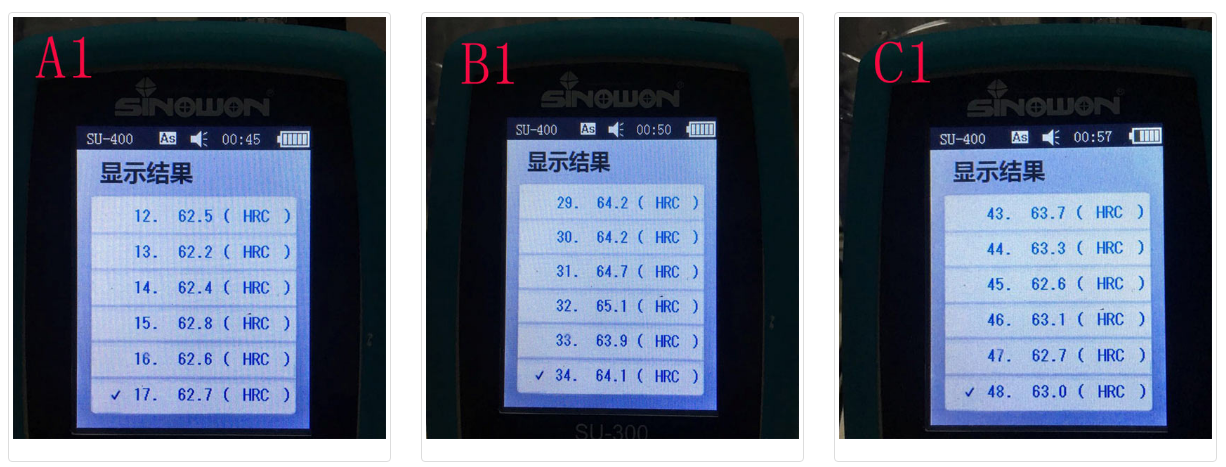
| A | 63.5 | 63.4 | 63.3 | 63.1 | 63.4 | 63.3 | 63.3 | 0.4 |
| A1 | 62.5 | 62.2 | 62.4 | 62.8 | 62.6 | 62.7 | 62.5 | 0.6 |
| B | 64.7 | 64.2 | 64.4 | 65.0 | 63.8 | 64.1 | 64.4 | 1.2 |
| B1 | 64.2 | 64.2 | 64.7 | 65.1 | 63.9 | 64.1 | 64.4 | 1.2 |
| C | 63.3 | 63.4 | 63.4 | 63.6 | 63.6 | 63.0 | 63.4 | 0.6 |
| C1 | 63.7 | 63.3 | 62.6 | 63.1 | 62.7 | 63.0 | 63.1 | 1.1 |
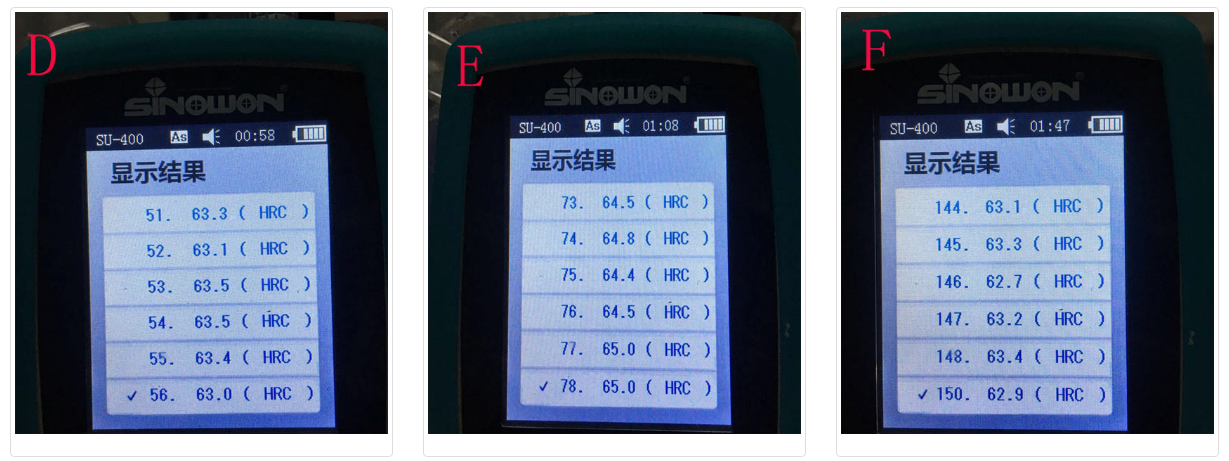
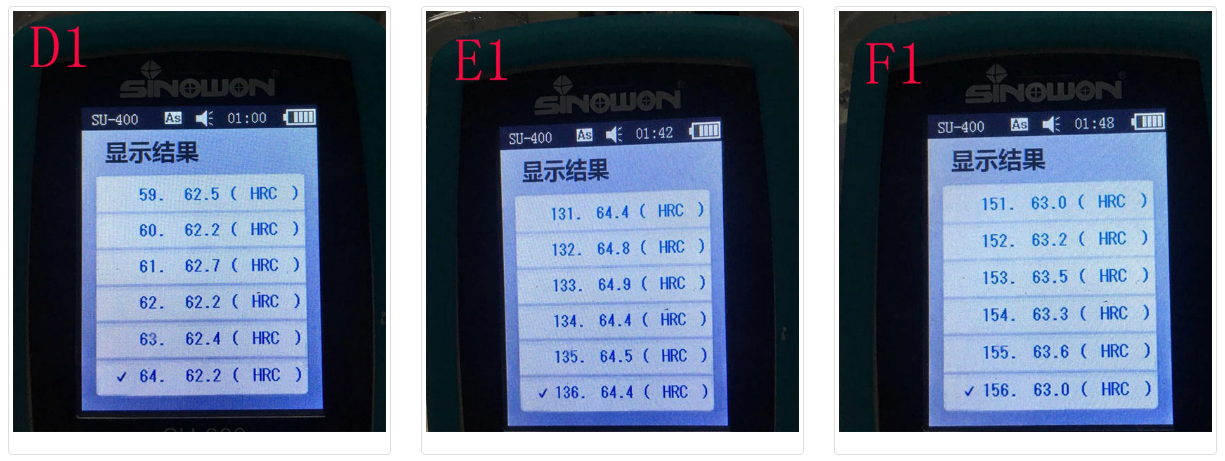
| D | 63.3 | 63.1 | 63.5 | 63.5 | 63.4 | 63.0 | 63.3 | 0.5 |
| D1 | 62.5 | 62.2 | 62.7 | 62.2 | 62.4 | 62.2 | 62.4 | 0.5 |
| E | 64.5 | 64.8 | 64.4 | 64.5 | 65.0 | 65.0 | 64.7 | 0.6 |
| E1 | 64.4 | 64.8 | 64.9 | 64.4 | 64.5 | 64.4 | 64.6 | 0.5 |
| F | 63.1 | 63.3 | 62.7 | 63.2 | 63.4 | 62.9 | 63.1 | 0.7 |
| F1 | 63.0 | 63.2 | 63.5 | 63.3 | 63.6 | 63.0 | 63.3 | 0.6 |
Remarks:
1)The value of the red font is the maximum and minimum of the same specimen of 6 times of the measurements.
2)Test time: 3 seconds/piece.
3)The times of the measurements:12×6=72 times ( 12pcs round bars, each round bar has been tested 6 times)
4)Total test time: in 4 minutes.
5)Maximum repeatability: 1.2HRC, minimum repeatability: 0.5HRC
6,Test conclusion:
Comparative analysis of measuring round bar samples’data between SU-400 Ultrasonic
Hardness Tester and DigiRock DR3
| Comparative Items | Digital Rockwell Hardness
Tester DigiRock DR3 |
Ultrasonic Hardness
Tester SU-400H |
|
| 1 | Single Test Time | 50 seconds/piece | 3 seconds/piece |
| 2 | Total Times of Measurements | 72 | 72 |
| 3 | Total TestTime | around 65 minutes | in 4 minutes |
| 4 | Maximum Repeatability | 1.6HRC | 1.2HRC(UCI) |
| 5 | Minimum Repeatability | 0.6HRC | 0.5HRC(UCI) |
The conclusions as below through the above data analysis:
1)SU-400 Ultrasonic Hardness Tester has better repeatability of hardness test value and better precision than Rockwell hardness tester’s.
2)The all specimens was measured with two instruments. The Rockwell hardness tester took 65 minutes to measure, the ultrasonic hardness tester SU-400 took less than 4 minutes, and the efficiency of ultrasonic hardness tester was 17 times of the Rockwell hardness tester’s. The ultrasonic hardness tester improves the labor efficiency of the quality control staff and saves labor costs for the enterprise.
3)The specimens are basically scrapped after tested by the Rockwell hardness tester, but the specimens tested by SU-400 ultrasonic hardness tester can be assembled and used continually. Ultrasonic hardness tester improves the quality control level of the enterprise, saves the sample loss and increases the profit of the enterprise.
7,Brand recommendation
Sinowon (Sinowon Innovation Metrology Manufacture Limited) is a national high-tech enterprise, participated in drawing up a national standard of ultrasonic hardness tester, a leader in ultrasonic hardness tester industry, a leading exporter of ultrasonic hardness testers, and has a service network with 300 dealers in China. It is the first brand for users to purchase ultrasonic hardness testers.
Attachments: the test results of SU-400 ultrasonic hardness tester are shown below:
